You might have noticed that I have a bit of a thing about pots. My family says it verges on an obsession. But I say it’s perfectly understandable and, actually, quite sensible. Pots, you see, are the easiest type of gardening – and the most instantly gratifying. Think about it like this: something that takes 20 minutes to create and minimal maintenance, can keep you happy for weeks…months even. What’s not to love?
Pots have always been a big part of my garden plans. I loved them even when I had the tiniest basement flat in London (pots are brilliant in tiny spaces!). And judging by the number of questions I get whenever I post pictures of my pots, I think they are also a big part of your garden plans, too.
So, I thought it would be useful to do a post that sums up my pot philosophy and also gives you some pot pointers….(can you see how much I’m loving the alliteration here?!). Think of it as Spring Pots In Ten Easy Steps…or something similar. Here goes:
* Pots are herd animals. They get lonely on their own – so give them some other pots to sit with. Try to mix sizes and heights as much as possible otherwise things will look a bit flat and uniform. The only exception to this is if you’ve blown the budget on an extra large pot – and even then, you will really need a pair to make things work visually….
* Decide on a pot material and style and stick with it. Two many different types of pot will look messy. I’m trying to create a classic, English country look, so I use Terracotta pots. The advantages of Terracotta? They are pretty. They age beautifully. They come in many shapes and sizes. They last for years and years. And you can buy a decent sized one for about £4.99. The disadvantages? If they are not labelled ‘Frost Proof’, they can crack when the soil freezes and expands (which makes them a tricky option for cold weather zones). And some people think they dry out more easily….but I haven’t noticed this.
* Consider splurging on at least a couple of handmade pots. They are to Terracotta pots what Prada is to handbags and will make everything look SO much better. I’ve slowly built up a collection of handmade Whichford Pottery pots (drool over them here https://www.whichfordpottery.com/) and, while they are pricey, they are so exquisite, that I think they are worth every penny.
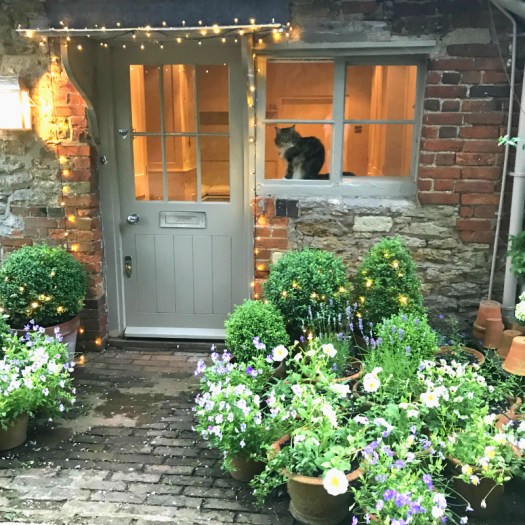
My collection of terracotta pots clustered together around the Boot Room door. The pots on the left are mostly cheap ones from the garden centre. The ones on the right and centre are handmade Whichford pots. Nim, just seen in the window, is priceless, obviously….
* If you ask people what sort of potting compost they use, you’ll get a million different answers. I find straight multi-purpose potting compost to be a little ‘light’ and it dries out easily, so I do a half-and-half mix with soil-based John Innes No 3. Yes, it makes the pot heavier, but it gives the plants a little more to live on and that’s important, because pot-living is tough on plants! Another important thing: I never use potting composts with peat in. That’s a major environmental issue which gardeners don’t need to add to (Google it!). Oh, and don’t forget to add a layer of crocks to the bottom of the pots. Crocks are broken up pots (gravel will do if you don’t have crocks) which help your pot’s drainage. Your plants – particularly bulbs – will not be happy if your pots don’t have good drainage.
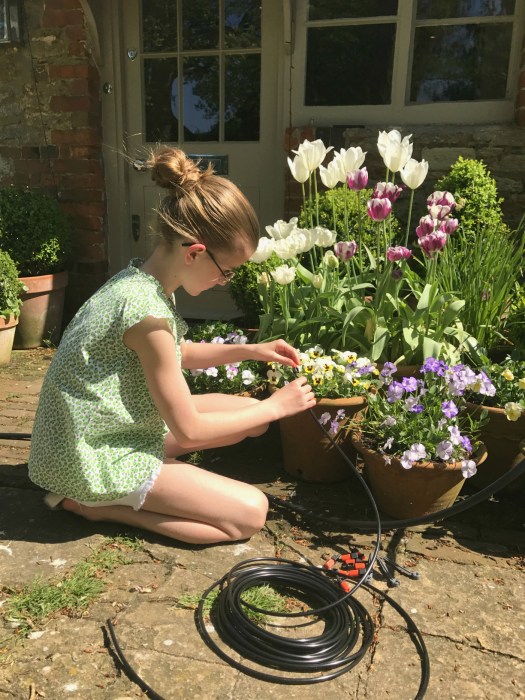
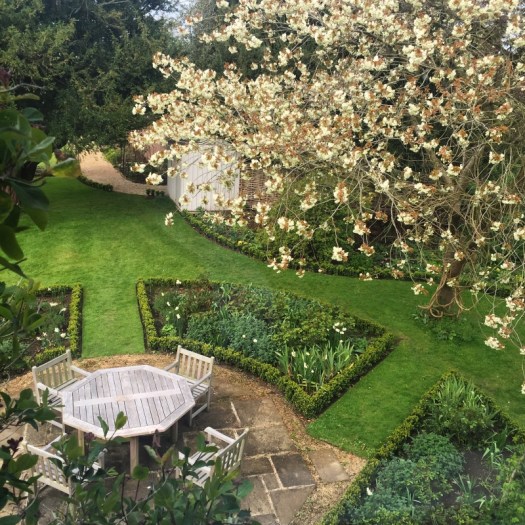
* Think of your pots as a snapshot of the garden and the season. So plant them with a variation of what is happening in the rest of the garden. In Spring , that means Narcissus, Crocus, Grape Hyacinth, Tulips and a froth of Pansies and Violas. Pots are also a chance to showcase low-key, but beautiful, flowers that might be lost in the general busy-ness of the garden (I’m thinking of that special, dark Hellebore). Or a flower that is so amazing, it needs to have its own showcase (stripy Tulip, anyone?). Put them in a pot and they are the star!
* Don’t scrimp! Less is most definitely less where pot planting is concerned. Work out how many plants you think you need and just about double it. My Spring pots are bulb-based and I have a rough idea of how many bulbs I can get in each pot (ie 10-15 in one layer). But, to have a great display, it’s a good idea to layer your bulbs. Plant your first layer about three inches from the bottom of the pot, add an inch of compost and then do another layer of bulbs above them. The flowers somehow work their way around each other and come up together looking plump and lushly planted. That is the look you want!
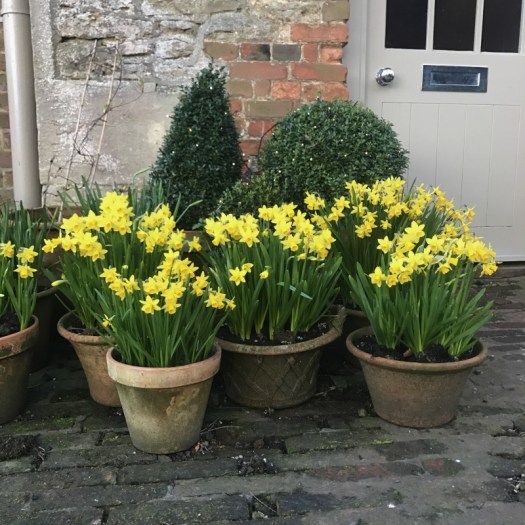
In March, these pots are chock full of Narcissus Tete a Tete. It’s probably the best early flowering dwarf Narcissus out there – flowers for weeks, smells delicious, loads of flowers on each stem…
* For Spring pots, plan ahead. And I mean way ahead. Spring bulbs should be planted in September/October the year before flowering. Buy good-sized bulbs from reputable suppliers (I use www.dutchbulbs.co.uk and www.dejager.co.uk in the UK and have been recommended www.floretflowers.com and www.brentandbeckysbulbs.com in the US) and choose varieties that flower for weeks and, importantly, at different times to give you a succession of flowers that starts in March and goes on till May. With Bulbs that is truly possible – another reason to love them! If you haven’t been this organised, you can buy ready-planted Narcissus, Crocus, Grape Hyacinth and Hellebores in good garden centres. It’ll cost you more than planting your own bulbs, but it will give you this effect instantly.
* What varieties do I plant in my Spring pots? Through trial and many errors, I’ve found that larger Narcissus varieties don’t fit the scale of pots. Too clunky and far too tall! Dwarf Narcissus and Cyclamineus Narcissus (a divinely delicate variety that looks like the petals are being blown back by a strong breeze) are my favourites. First to flower in early March is tiny, canary yellow, Tete a Tete, which has the added bonus of multiple, cheery flower heads on one stem. I bought extra large bulbs last year and they flowered their little hearts out for weeks. Next comes Jenny – another dwarf, but fantastically elegant with its milky-white windswept petals and creamy yellow trumpet. When the Tete a Tete are finished, Thalia appears. Thalia is a Triandrus Narcissus bred just over 100 years ago. Delicate, green-white petals, multi-headed and scented, it might just be my favourite Spring flower. Last to appear – and at the same time as the Tulips in May – is Narcissus Geranium. Geranium breaks my rules about full size narcissus in pots. But it gets away with it because it smells absolutely delicious and it’s yolk-orange trumpet and white petals are so fresh and zingy.
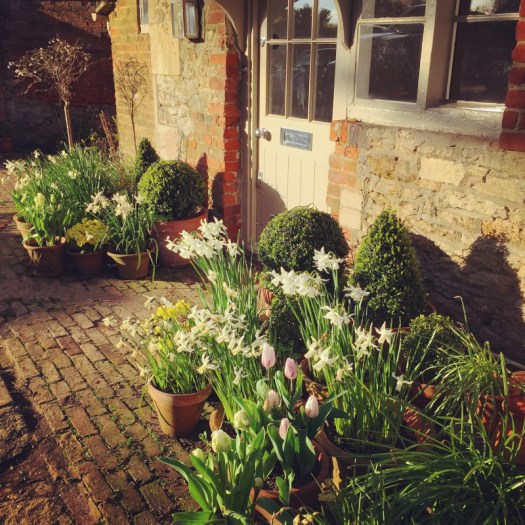
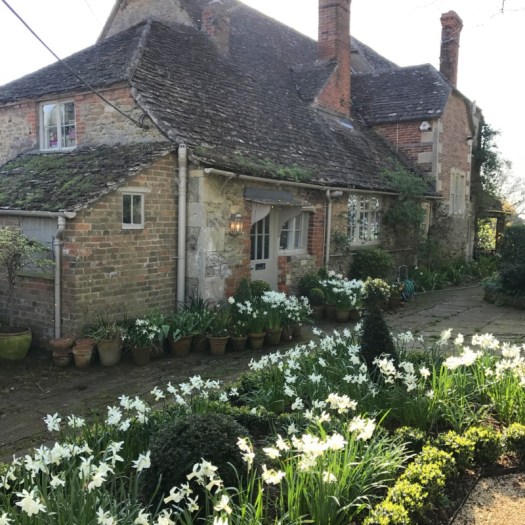
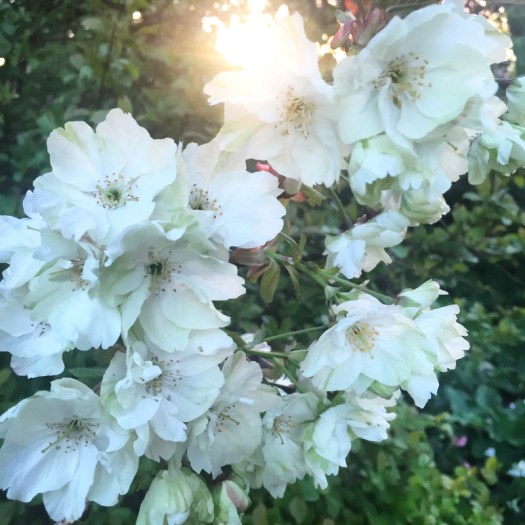
This is April/May and the white Narcissus and Tulips are now the stars. At the back, is supremely elegant, Narcissus Thalia, and in front of that, Narcissus Jenny (see what I mean about the petals looking windswept?). The Tulips are White Parrot and Blueberry Ripple.
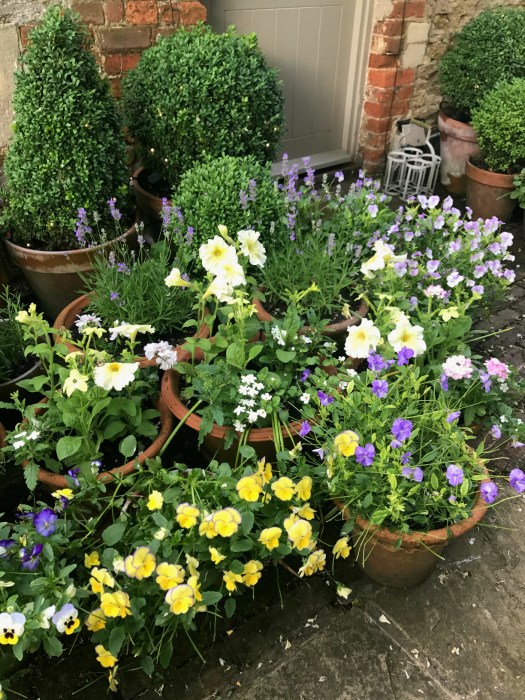
* Choose a limited range of colours. With Narcissus, that’s a no-brainer as they only really come in yellow and white. But, with Tulips and other Spring bedding – pansies, polyanthus, violas – you need to curb any desire for garish multi-colours and pick a colour family that will work harmoniously together. Dark purple tulips with lilac and white violas; Candy striped tulips with white pansies…you get the idea.
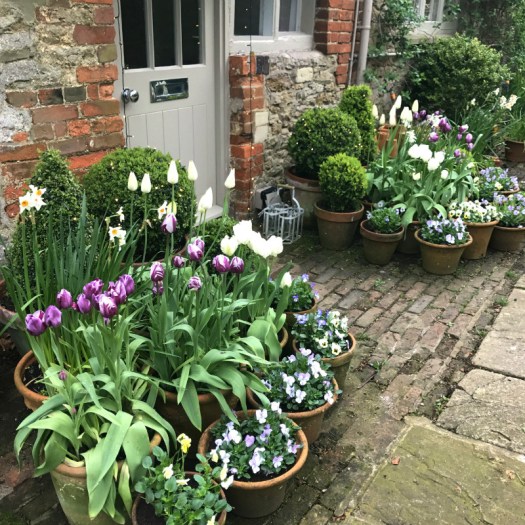
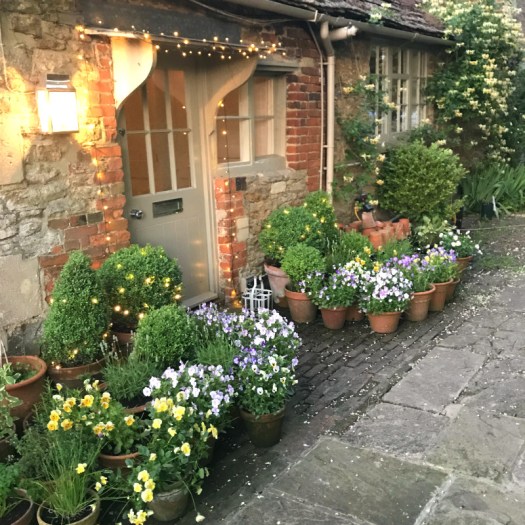
* The Best places for your Spring pots? Cold and unpredictable February, March and April weather often means we are confined to our houses – so put them close to the house. Cluster them around your front door so that they are the first thing you see when you leave the house and the first thing you see when you arrive home. An instant mood lifter! Finally, don’t ever think your pot collection is a static thing that has to stay the way it is for all time. I’m always rearranging my pots; bringing forward whatever looks best at the time; hiding what’s looking dull at the back; playing around with colour combinations and shapes. Switch things around! Be creative!

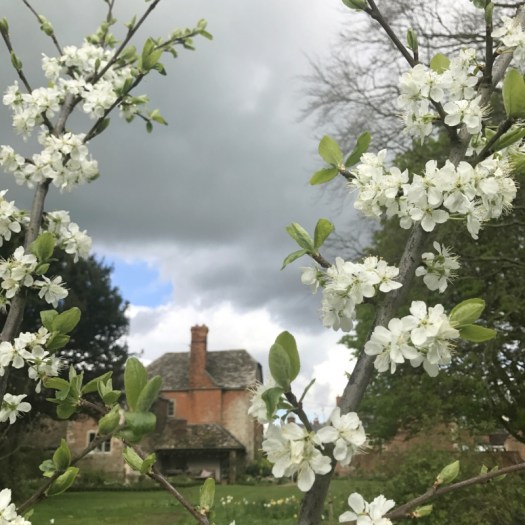
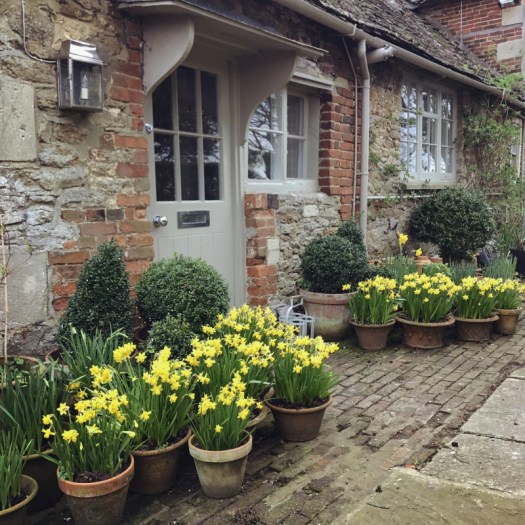
This is the view I have when I arrive home: a ‘herd’ of pots full of cheery colour set off by the formal shapes of my potted box balls and cones. That little tree on the left of the picture is a dwarf Cherry tree (Prunus Kojo-no-mai). I brought it from my London garden when we moved here. It’s name means ‘flight of butterflies’.
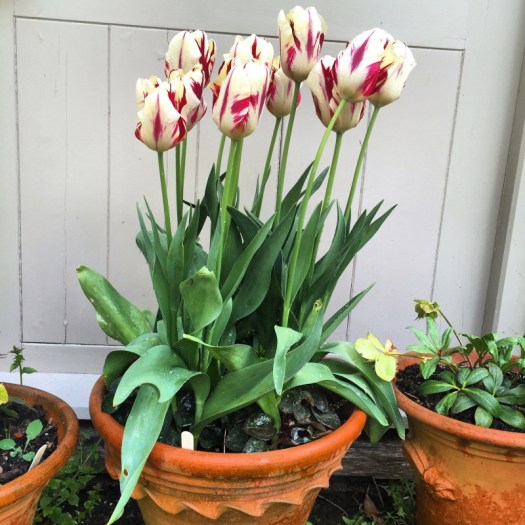
See what I mean about how potting up a plant makes it the star? This is Tulip Raspberry Ripple. Completely delicious! Tulips are unreliable in pots after their first year, so, once they’ve finished flowering, I either plant them in the cutting garden or put them on the compost heap.

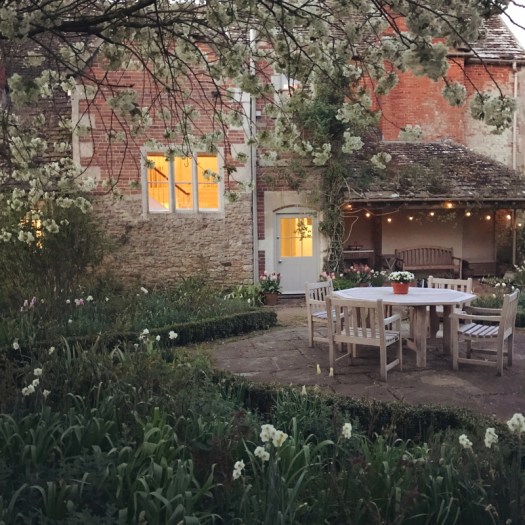
Early evening in March. Did I mention how good fairy lights look with Spring pots full of Narcissus? I put these on the Box balls and cones one Christmas and never took them off again. These Narcissus will be happy living in the pots for two to three years. I then dig them out, plant them around the garden and replace them in the pots with fat, new bulbs.
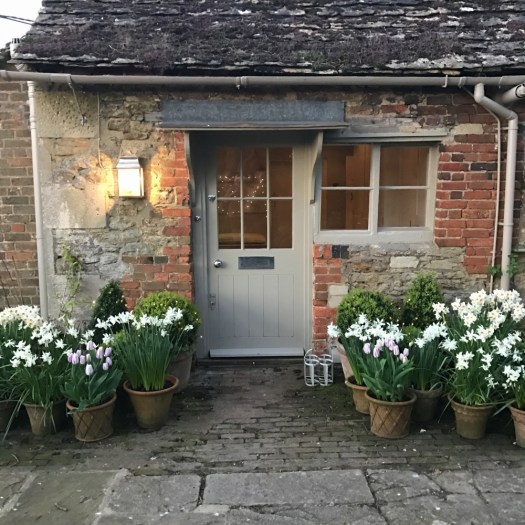
The same view (minus Poff) about six weeks later. You can see how I break my rule about full-size Narcissus where Thalia is concerned. And those cheery flowers with the yolk-yellow eye at the back are Narcissus Geranium (heavenly scented in the Spring evenings). The pots of Tete a Tete have been moved to the sides or back to die back quietly.

A little closer, so you can see Narcissus Jenny a little better. And take a look at the lattice pots from Whichford – they are my favourites. This is late afternoon, when this part of the house is bathed in the most extraordinary, golden light.
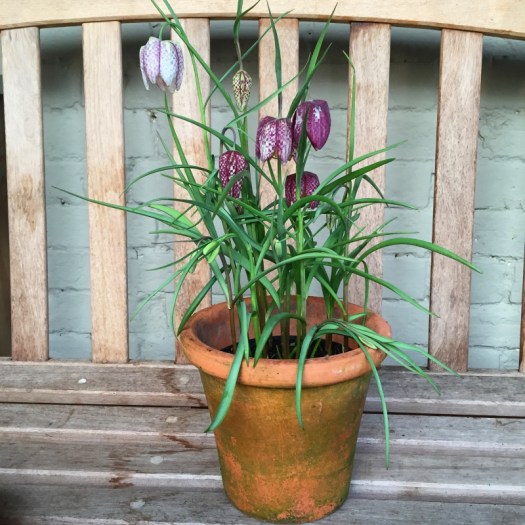
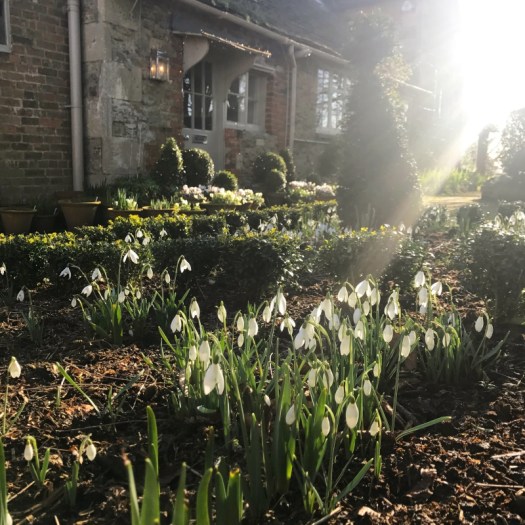
I love putting Spring flowers like these Snakeshead Fritillary in a pot so that I can admire them up close. I grow some under a tree at the far end of the garden, but I’m not down there every day.
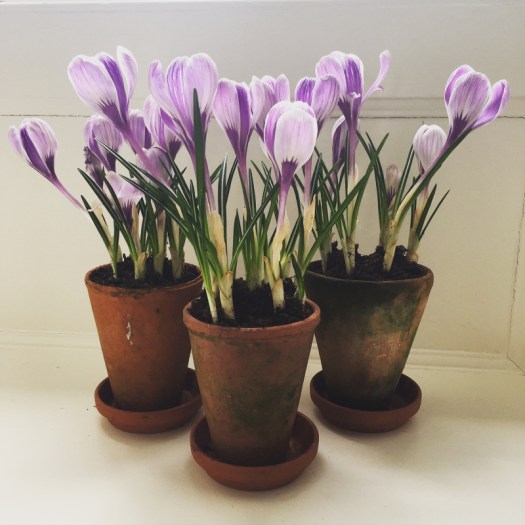
The same goes for crocuses. They’re often overlooked in the garden. But potting them up brings them brilliantly into focus.

This is the May finale of my Spring pot display: Recreado Tulips and Wisteria by the Georgian front door. Proving what I was saying about keeping things in the same colour family….